Access to Appointment settings and the Online Appointment Scheduler options can be found by selecting the Gear icon at the top right of the Appointments screen.

Once you click the gear icon it will open another page with menu options to select including Calendar, Services, Scheduler, Website Integration, Calendar Feed, Pending / Confirmation Messages, Available Vehicle Makes, and Max Multibooking.

Appointment Settings Available
The settings and options available through the Appointment Settings menu include:
- Calendar - Adjust or Change your calendar view options.
- Services - Services that are available for your customers to select when they request an appointment through the online scheduler.
- This includes an option to set a time frame for each service and the maximum amount of these that you want to be available to schedule per day.
- For example, you can set an oil change to last 30 minutes and a transmission flush to last 3 hours, and allow up to four oil changes per day but only one transmission flush. Those can be changed by adjusting the boxes shown below:

- For example, you can set an oil change to last 30 minutes and a transmission flush to last 3 hours, and allow up to four oil changes per day but only one transmission flush. Those can be changed by adjusting the boxes shown below:
- Set the Open Order Exclusion Days - A setting that skips customers with recent open repair orders from appointment reminder campaigns. This can be useful if you use time blocks on your calendar for repairs that take multiple days and you can set the number of days you wish for this to apply to. If it is set to 0 then it will not exclude any customers regardless of repair orders.
- This includes an option to set a time frame for each service and the maximum amount of these that you want to be available to schedule per day.
-
-
- As an example: A customer drops off their vehicle Saturday, but parts won’t arrive until Monday, so you block time on your calendar for Monday and Tuesday to complete the repair. If you don’t want the customer to receive reminders for these repair blocks, use this setting so customers with an open repair order in the last week do not get appointment reminders.
-
- Scheduler - Hours that your shop is available for appointments, how many hours in advance an appointment must be scheduled, lead time handling, time slot intervals, and pick up/drop off options. For more on this page please see Setting Your Appointment Scheduler Options in Retention Pro
- Website Integration - HTML or CSS code for adding the Online Scheduler to your website. For more on adding the Appointment Scheduler please see Adding the Appointment Scheduler to Your Website
- Calendar Feed - Link to export your Retention Pro calendar to an external calendar.
- Pending / Confirmation Messages - The email and text that your customers receive when you add an appointment they requested to your schedule.
- Includes a toggle for “Auto-confirm all new appointment requests.” When enabled, any appointment requested through the online scheduler will be automatically approved and added to your calendar without requiring your review.
- When auto-confirm is enabled, use the toggles directly below to choose whether those customers receive their confirmation by text message, email, or both.
- Available Vehicle Makes - If you only service specific vehicles you can use this option to only allow customers to select specific vehicle makes when scheduling appointments.
- Max Multibooking - The maximum number of online appointments that can be scheduled per time slot.
Appointment Reminders
You can quickly access any Appointment Reminder campaigns you have available from the bottom of the Settings section in Appointments.

These will be the same campaigns that can also be found in the Campaigns section, this is only intended as a quick additional access point and they are not duplicate/additional campaigns. Any changes made by accessing the campaigns from the Appointments area will be the same as if you had accessed them from the Campaigns area.
You can also create new or duplicate Appointment Reminder campaigns from this section. Click the Add New Reminder button at the top right, and a dialog box will open where you can choose whether to create a text or email version of the appointment reminder campaign.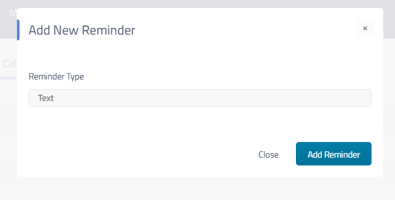
Once you click the Add Reminder button it will open to the campaign edit screen for the new reminder campaign where you can make any necessary changes.
See Text Campaign Variables , Text Message Campaign Basic and Additional Filters , Email Campaign Basic and Additional Filters , and Campaign Scheduler For Continuous Campaigns for more information on editing/activating a campaign.