Payments Pro Overview
Payments Pro is a payment option available for Retention Pro subscribers. This is an extended user's guide to using Payments Pro.
What is Payments Pro?
Once Payments Pro is enabled you will have the ability to text and email payment requests to your customers right from your repair orders page in Retention Pro.
Payment requests can be sent directly from a customer’s repair order or you can create a “one-off” payment request by searching a customer that has been synced into Retention Pro from your shop management system.
You can learn more about the repair orders page by going to Repair Orders Page Overview
What fees are associated to Payments Pro transactions?
The current default rate for each successful transaction collected through text or email to pay is:
-
2.8% + 15¢ USD per every successful credit card transaction
The associated fee will be collected upon your customer’s successful transaction and the remaining funds will be paid out to your bank account based on the Payments Pro payout schedule.


What is the Payments Pro Payout Schedule
The current default payout schedule for all payments collected using Payments Pro is:
-
Daily - 2 day rolling basis
Please note that your first payout can take anywhere from 2-14 days to hit the bank account you setup during your Payments Pro onboarding.
Payout Schedule Explained
With a daily - 2 day rolling payout schedule Payments Pro pays out funds daily from transactions captured 2 business days earlier.
- As an example: If you receive payments on Tuesday and Wednesday, the payout for Tuesday would be on Thursday and the payout for Wednesday would be on Friday.
How to setup Payments Pro
-
Navigate to your Repair Orders page in Retention Pro.
-
Click on Setup Up Payments at the top right.
-
If you already have Payments Pro enabled this button will say Create Payment
-
If you are a legacy 360 payments user you will not see any setup options. You will need to delete 360 payments in order to proceed with Payments Pro setup.
-
-
You will be redirected to [Payment Processing] under company settings.
-
Click Add Payments Pro

 Click Complete Onboarding
-
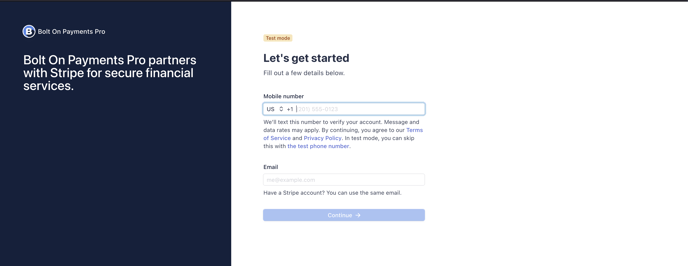
You will be redirected to a secure form to:
-
Verify your business.
-
Verify your identity.
-
Input your bank account to receive payouts.
-
-
-
Once your information is verified and you submit your form you will be redirected back to Retention Pro.
-
A green check-mark will display indicating you are all set and can now start collecting payments!


Sending Payment Requests
You can request a payment from your customer via text or email on the Repair Orders page by using the following options.
-
Create Payment Button
-
Payment is not associated to a repair order.
-
-
Collect Payment Button
-
Payment is associated to a repair order.
-
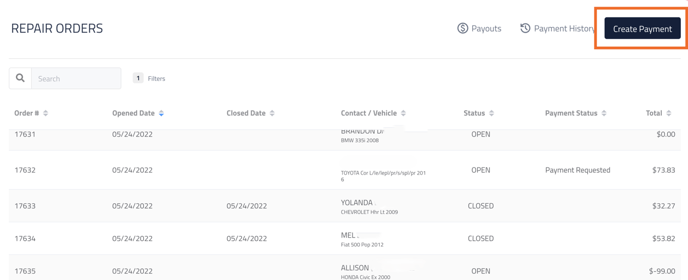
Create Payment Button
When Payments Pro is activated the next time you navigate to their repair orders page you will see that the [Setup Payments] button now says Create Payment


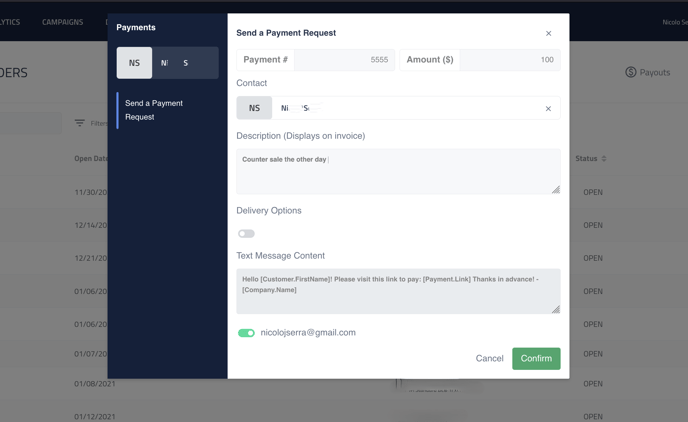
When you click [Create Payment] you will be presented with a pop up to do the following.
-
Enter a Payment #: This will display as the invoice number on the invoice landing page sent to your customer.
-
Amount: The total dollar amount to be paid by your customer.
-
Contact: Search box to choose the customer to send the payment request to.
-
Description: This will be what displays in the line item section of the invoice landing page that is sent to your customer.
-
Delivery Options: Ability to enable or disable the delivery method the request is sent to (Email or Text)
-
Text Message Contact (Not editable): This is the text message content that is sent to your customer.
-
Confirm: Sends the request based on the delivery methods selected.

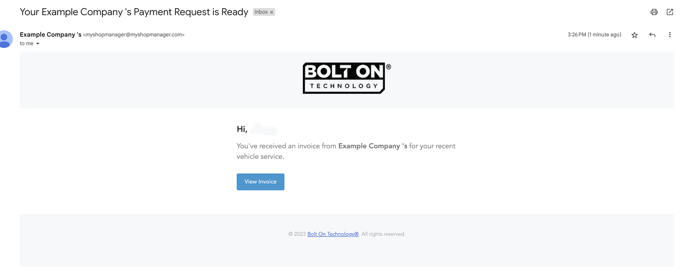
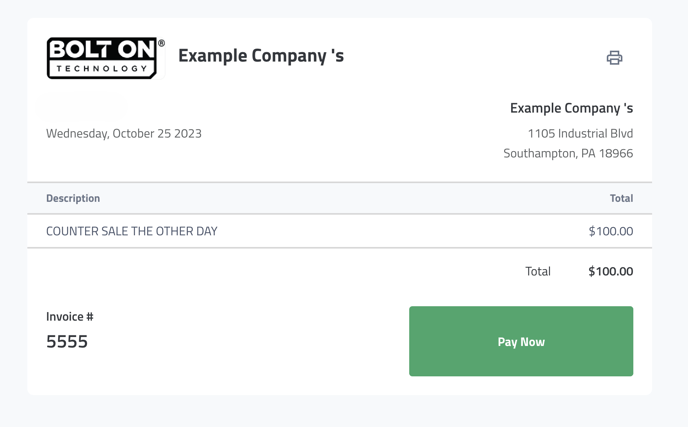
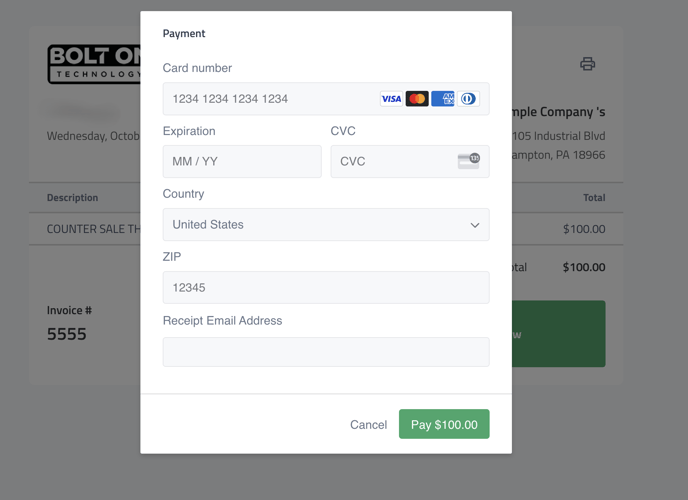
[Create Payment] Email and Invoice Landing Page Example
-
Email will display your shop logo

Payment confirmation page
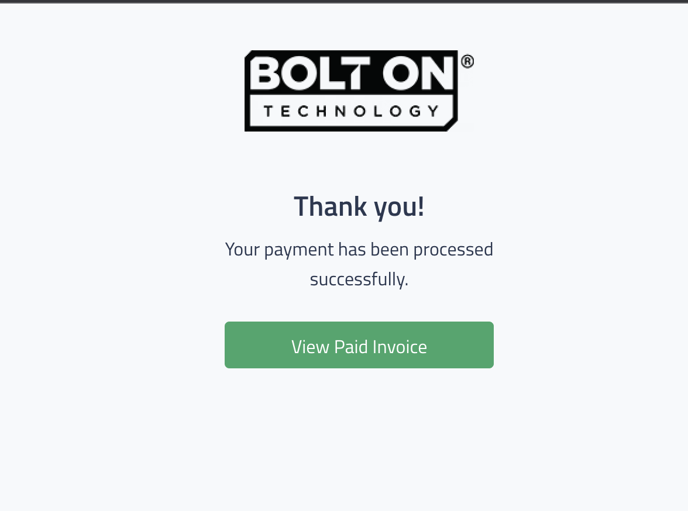
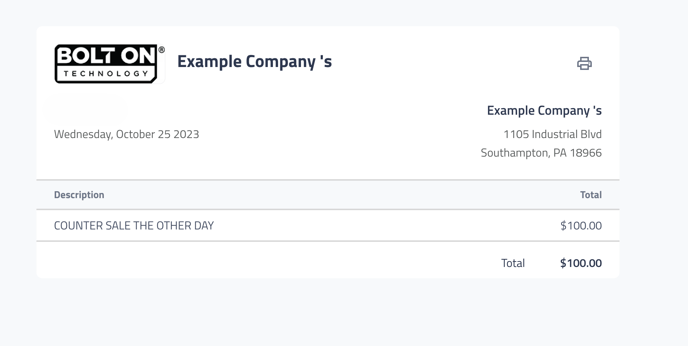
When your customer submits a payment they will be directed to a confirmation page where they can view and then print their paid invoice.
-
You will receive an email notification of successful payments if you have that enabled on your profile under user settings.


Collect Payment Button
When Payments Pro is activated the next time you navigate to a specific repair order you will be able to click the [Collect Payment] button at the top right.
When a you click [Collect Payment] you will be presented with a similar pop up as [Create Payment] except the information will be auto-filled with the customer information associated to the repair order.
When collecting payment three options are available:
-
Send Payment Request (works the same as in ‘Create Payment’)
-
Use Payment Terminal (works the same as in ‘Create Payment’)
-
Collect Debit/Credit
-
This feature will allow you to input credit card information manually instead of using a terminal.
-
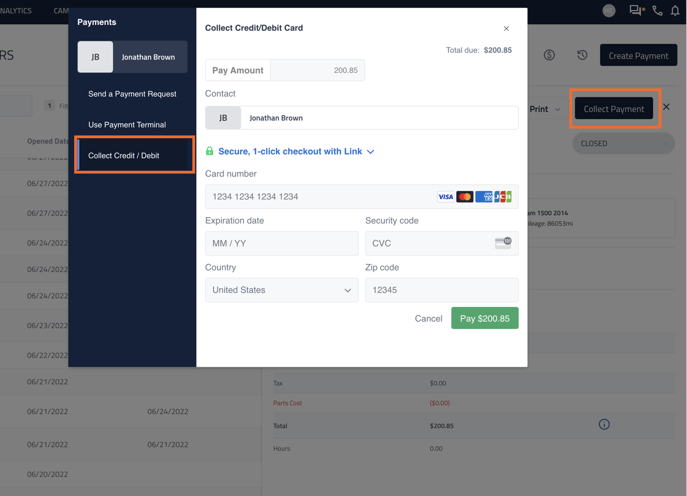
The Collect Credit/Debit feature (aka manual CC input) can only be used with ‘Collect Payment’ button inside of Repair Orders. The feature does not appear when you click ‘Create Payment' from the Repair Orders page. This is not possible because a payment intent must already be present in the system. These are created with RO’s.
Payments Status
-
When a payment request is sent from a repair order the payment status will display as [Payment Requested].
-
When a payment request associated to a repair order is paid then the payment status will display as [Payment Made].
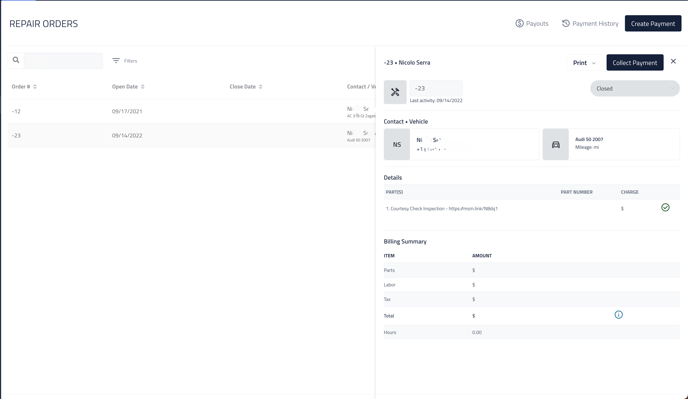

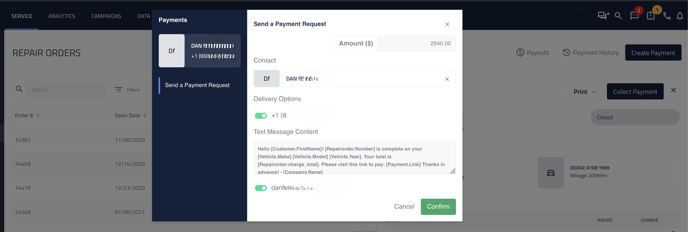

[Collect Payment] Email and Invoice Landing Page Example
-
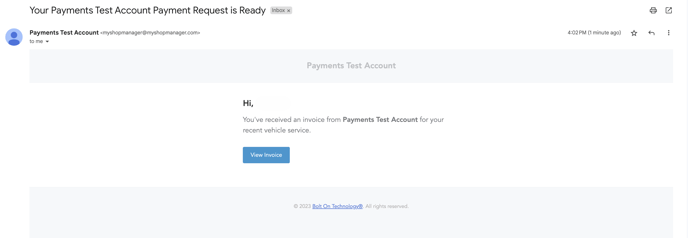
Email will display your logo
-
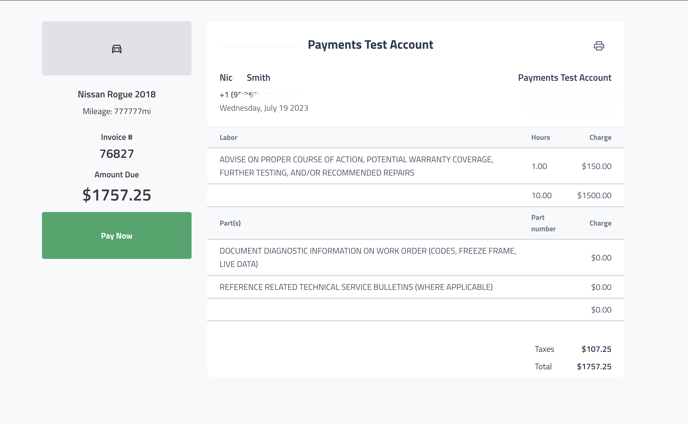
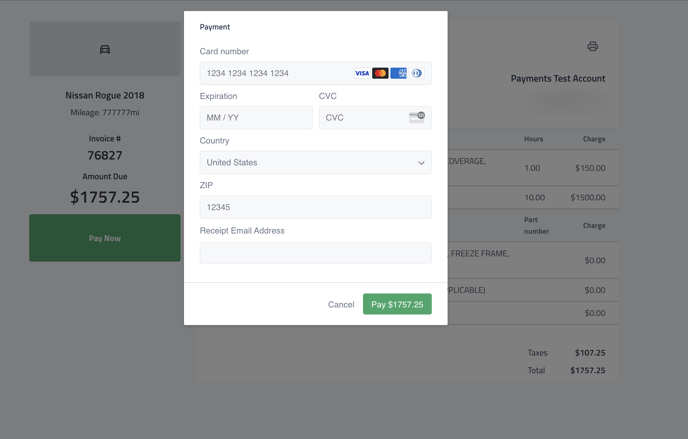
Invoice will be a more in depth breakdown based on what is included in the repair order that was synced from your shop management system.


Payment confirmation page
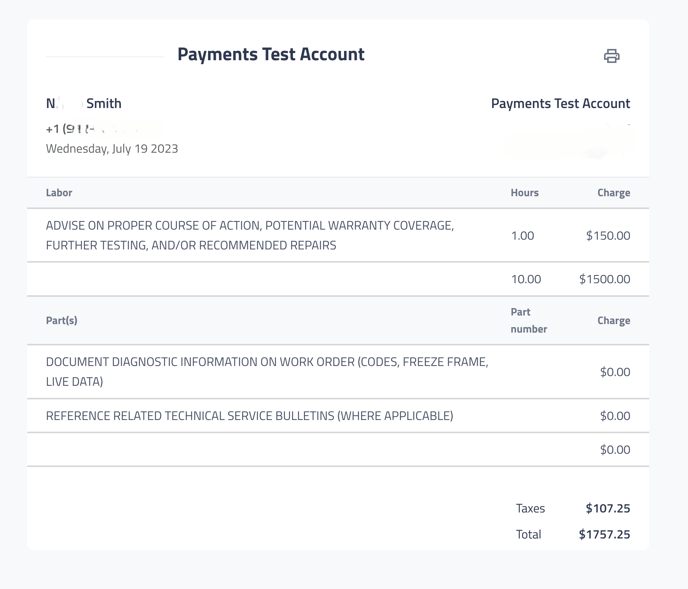
When your customer submits a payment they will be directed to a confirmation page where they can view and then print their paid invoice.
-
You will receive an email notification of successful payments if you have that enabled on your profile under user settings.



What are Credit Card Readers?
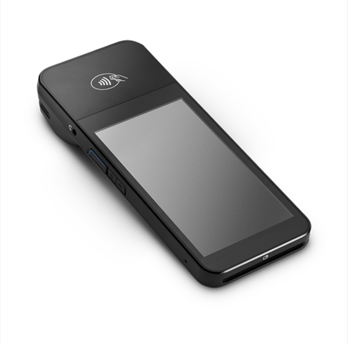
Stripe Credit Card Readers allow you to collect in-person card payments at your counter directly from the Repair Order page.

How to Collect Payments with the Stripe Credit Card Readers
Similarly to sending a payment request online, when collecting payments with a Credit Card Reader you’ll have two options;
-
Create Payment Button
-
Payment is not associated to a repair order.
-
-
Collect Payment Button
-
Payment is associated to a repair order.
-
Using [Create Payment] Button with a Credit Card Reader
When Payments Pro is activated the next time you navigate to your repair orders page you will see that the [Setup Payments] button now says [Create Payment].
When a card reader is activated on your account, the next time you click [Create Payment] you will be presented with a pop up to do the following.
-
[Send a payment request]
-
[Use payment terminal]
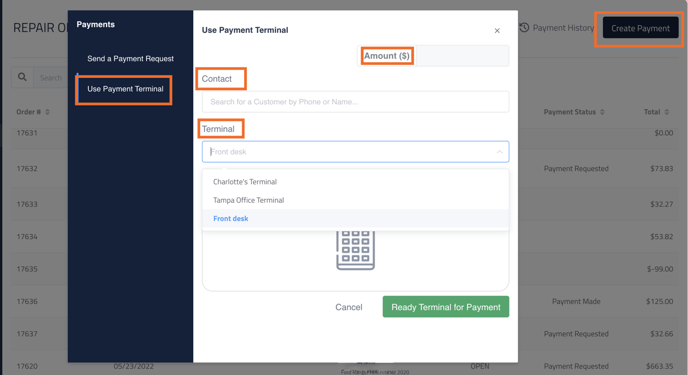
You will then have the following options from a pop-up window:
-
Enter a Payment #: This will display as the invoice number on the invoice landing page sent to your customer.
-
Amount: The total dollar amount to be paid by your customer.
-
Contact: Search box to choose the customer to send the payment request to.
-
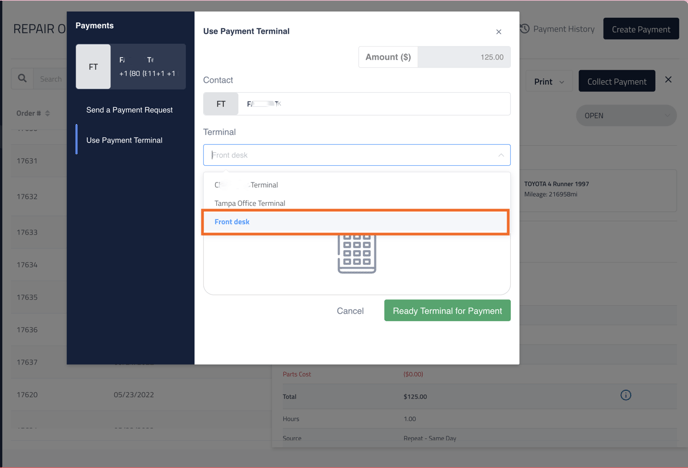
Terminal: Search box to choose the terminal you wish to use.
Using [Collect Payment] Button with a Credit Card Reader
When Payments Pro is activated the next time you navigate to a specific repair order you will be able to click the [Collect Payment] button at the top right.
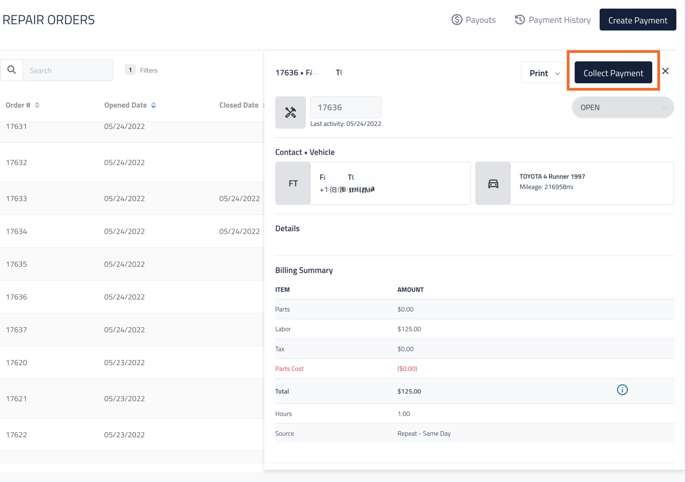
When you click [Collect Payment] you will be presented with a similar pop up as shown above except the information will be auto-filled with the customer information associated to the repair order.
Partial Payments
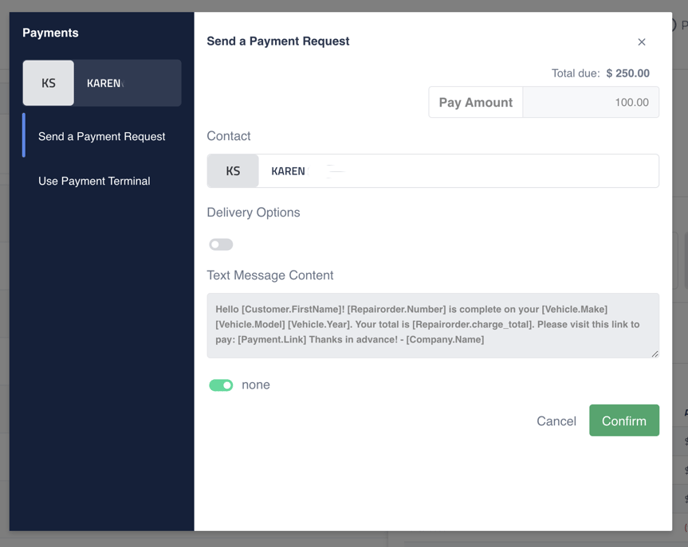
You can collect a partial amount instead of the total amount of the repair order.
-
The remaining balance will be reflected in the Repair Order when partial payments are completed.
-
When a Repair order has been paid in full, no further payments can be collected on that same Repair order.
Readying The Card Reader To Receive Payments
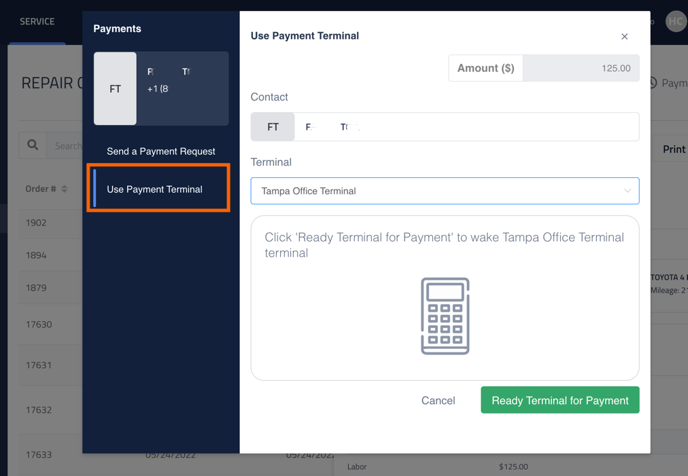
When [Amount] and [Contact], are filled in, you may proceed to Ready your terminal.
-
Select [Use Payment Terminal] when you are taking in-person payments.
-
Select the [Terminal] you wish to use.
-
Click [ Ready Terminal for Payment]
-
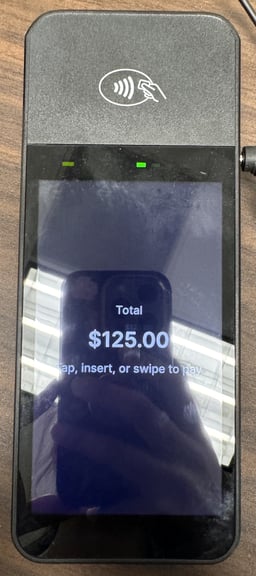
Wait for transaction amount to appear in your terminal.

-
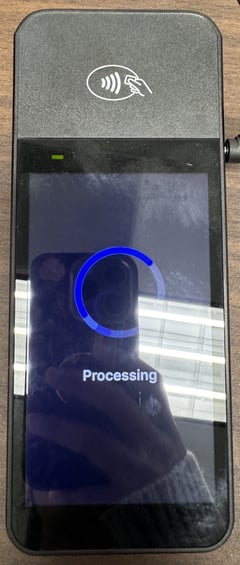
Tap or Insert card
-
Payment Confirmation Screen
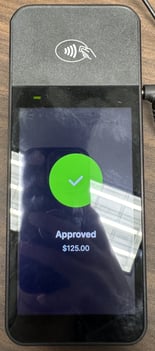
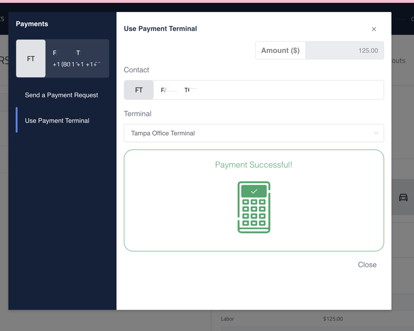
When your customer transaction is successful, they will receive confirmation on the credit card reader screen.
When a payment is successful, the payment status on the repair order will display as [Payment Made].
Payout & Payment History
In the Repair Orders page, you can also navigate to [Payouts] and [Payment History].

Payouts
This page will display your payout ID, total payout amount, and the date the funds will be deposited into your bank account.
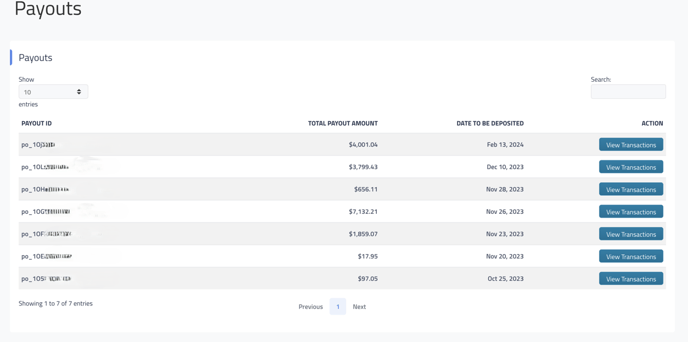
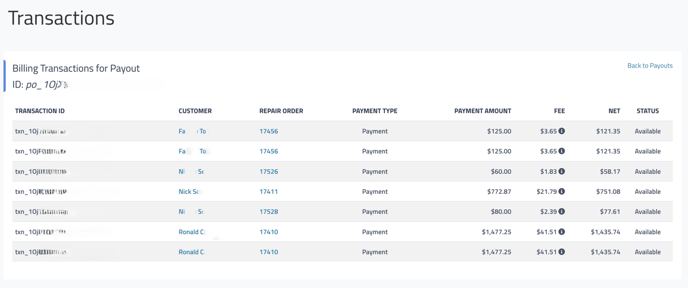
Clicking [View Transactions] next to a Payout will allow you to view all the transactions associated to the payment with applicable fees.
Payment History
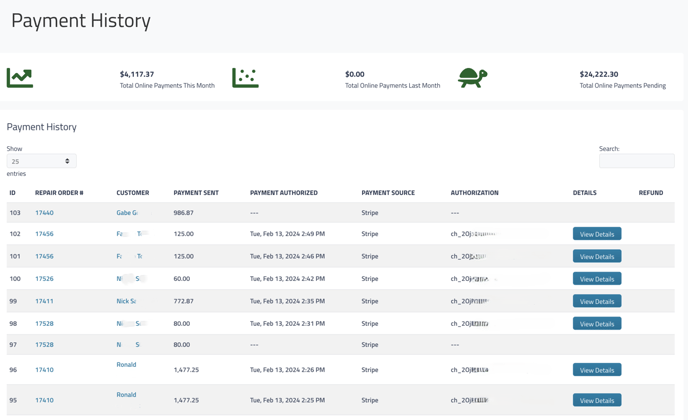
The payment history page will allow you to see the status of each payment request that was sent, as well as refund payments if needed.
