NextGear Inspections
The inspection process varies between NextGear standalone and integrated versions. Please refer to the relevant article for your integration for further details.
Creating an inspection
-
Login to your NextGear account.
-
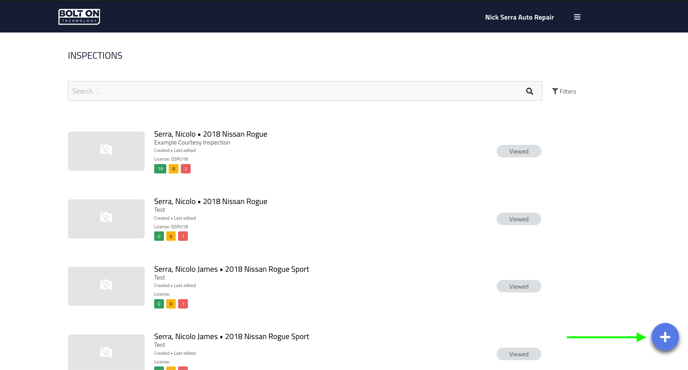
Navigate to your inspections page.
-
Click the [+] icon at the bottom right of your screen.
-
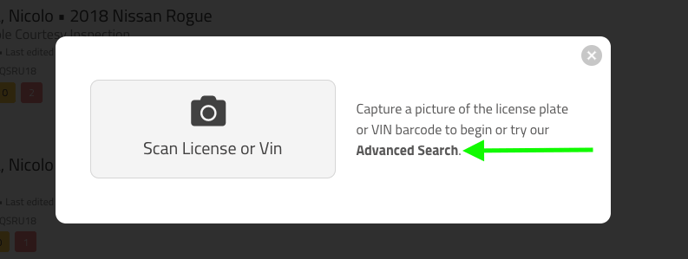
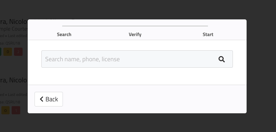
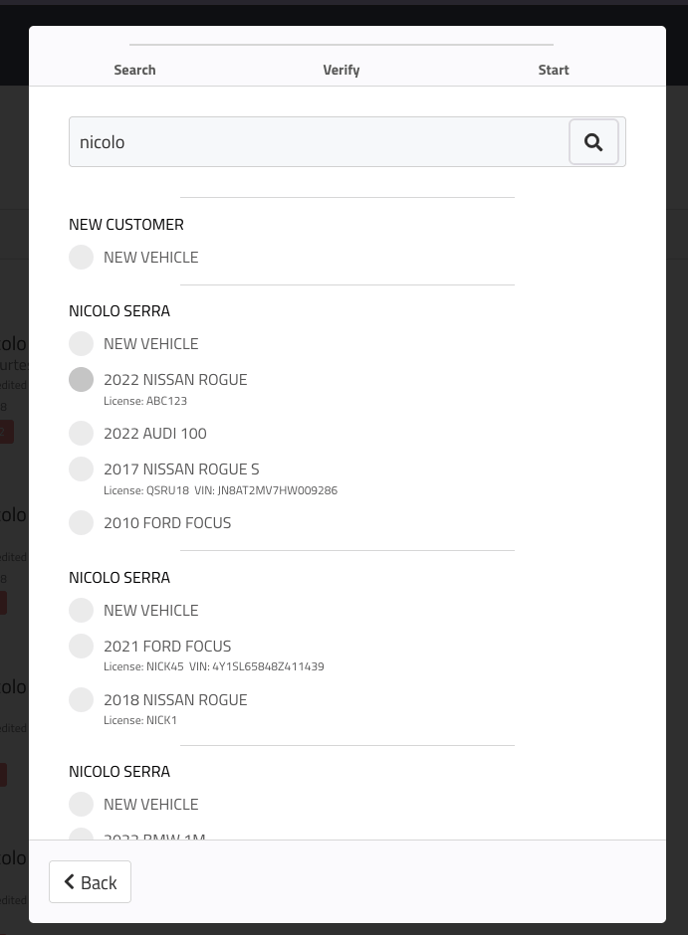
Scan your customer's license plate or VIN.
-
Click [advanced search] to enter information manually.
-
-
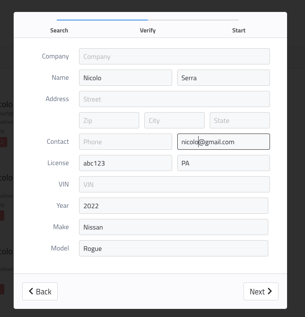
Confirm your customer’s information.
-
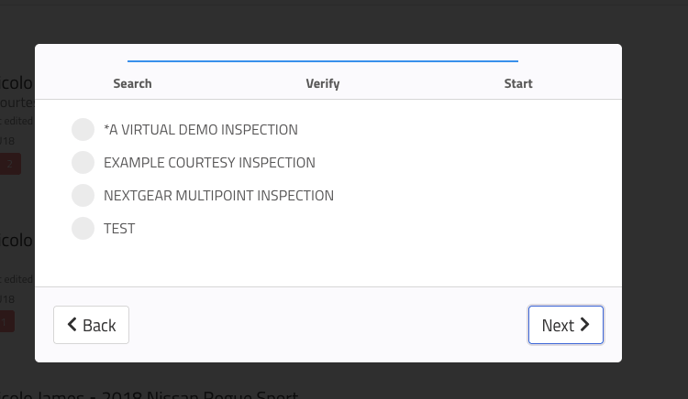
Choose your inspection template.
-
Start your customer’s inspection.
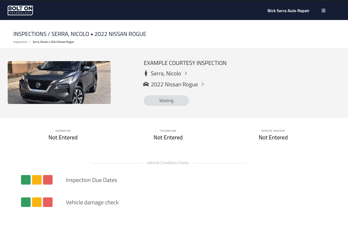
Once you create your inspection it will be in the [Waiting] status.




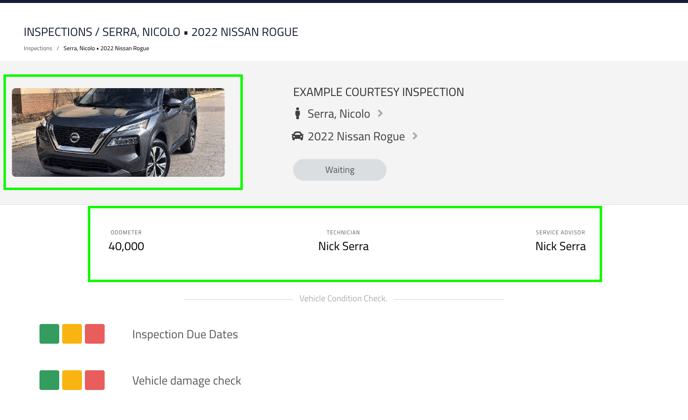
Adding vehicle image, odometer, technician, and service advisor
We highly recommend that you start each inspection by entering the information below:
-
Vehicle Image: Click the image box at the top left of the inspection to open your camera or attach an image from your computer.
-
Odometer: Clicking the odometer section will open a pop up window. Enter the vehicle’s odometer reading and then click [Ok].
-
Technician: Clicking the technician section will open a pop up window. Select the assigned technician from your NextGear user list and then click [Ok].
-
Service Advisor: Clicking the service advisor section will open a pop up window. Select the assigned service advisor from your NextGear user list and then click [Ok].

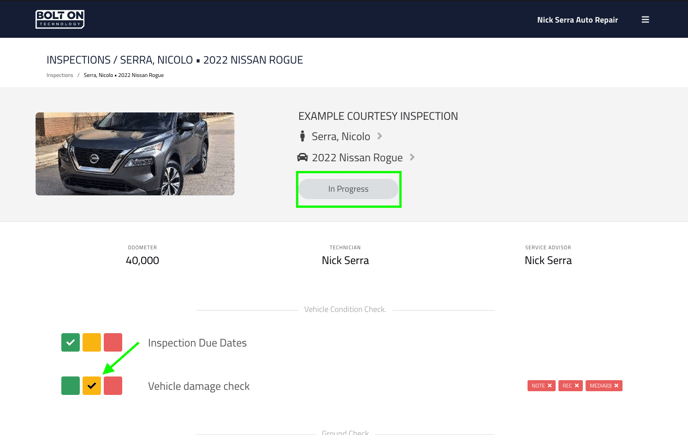
Starting your inspection
Your inspection will remain in the [Waiting] status until you complete your first inspection point.
-
Scroll down to your inspection point section.
-
Click either the green, yellow, or red check next to each point.
-
Green: Everything looks good.
-
Yellow: There is something to note or a recommendation to make.
-
Red: There is a issue that needs to be addressed asap.
-
-
Clicking your first point will change your inspection status to [In Progress].
-
Clicking the green check box next to an inspection point will not trigger a secondary action.
-
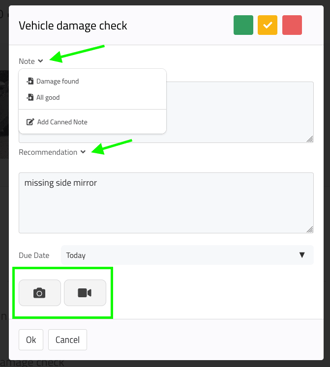
Clicking the yellow or red check box next to an inspection point will open a pop up window to add notes, recommendations, images, and videos.
-
You can add notes / recommendations manually, choose from existing canned notes / recommendations, or add new canned notes / recommendations all from this window.
-
-
After you've entered all your notes, recommendations, and any media related to the inspection point, simply click [Ok] to save your updates.

-
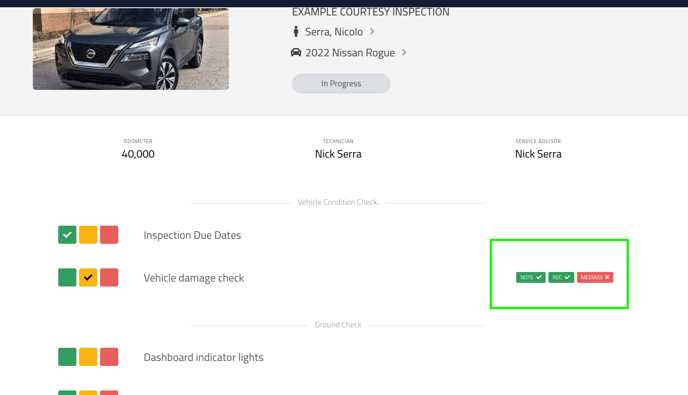
After you click [Ok] you will notice three tags to the far right of the inspection item.
-
Note
-
Recommendation
-
Media
-
-
If the tag appears red, it indicates that it has not been added to the inspection item.
-
If the tag is green, it indicates that the corresponding information has been added to the inspection item.

Sharing your inspection
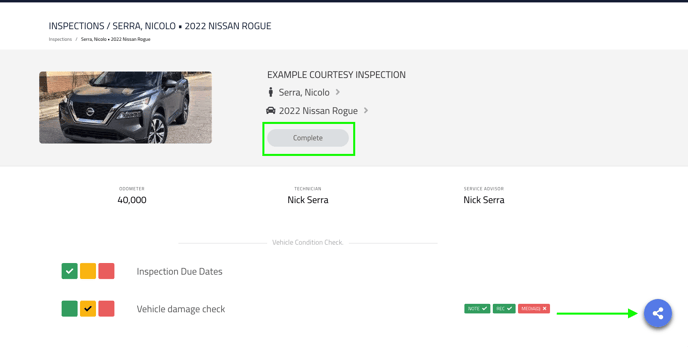
After completing all inspection items, the status of the inspection will update to [Complete]. At this point, you are prepared to share the inspection results with your customer.
Sharing from within the inspection
-
Click the share icon at the bottom right of the inspection screen.
-
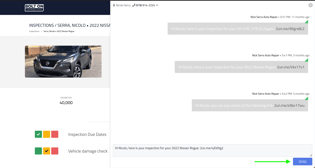
This will open the NextGear message center and allow you to review the message prior to sending.
-
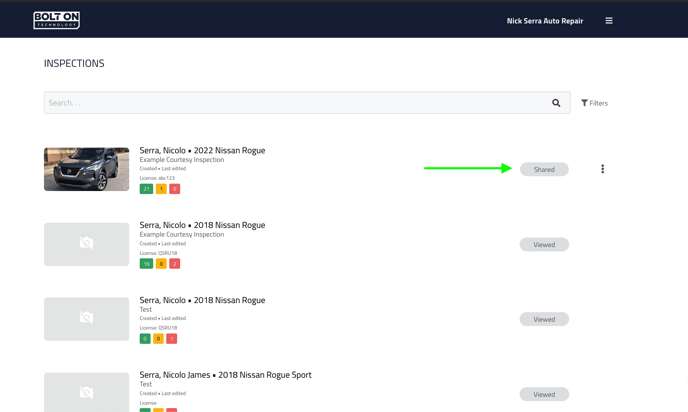
Once you send your message the inspection status will changed to [Shared].


Sharing from the main inspection page
-
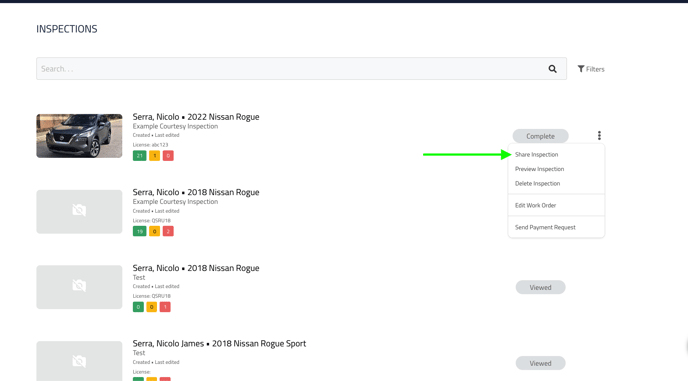
Navigate to your main inspection page
-
Click the three stacked dot icon to the far right of the inspection you wish to share.
-
Click [Share inspection].
-
This will open the NextGear message center and allow you to review the message prior to sending.
-
Once you send your message the inspection status will changed to [Shared].


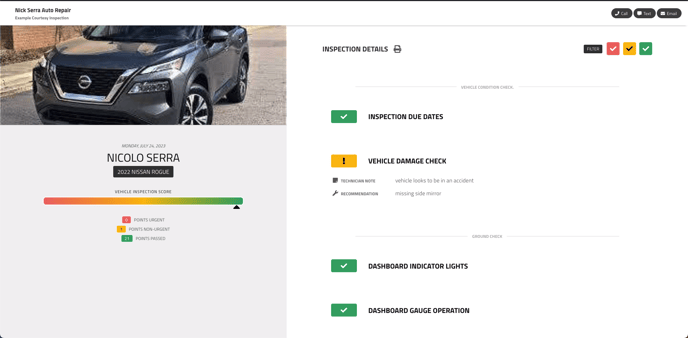
Example of customer view

Inspection check out process
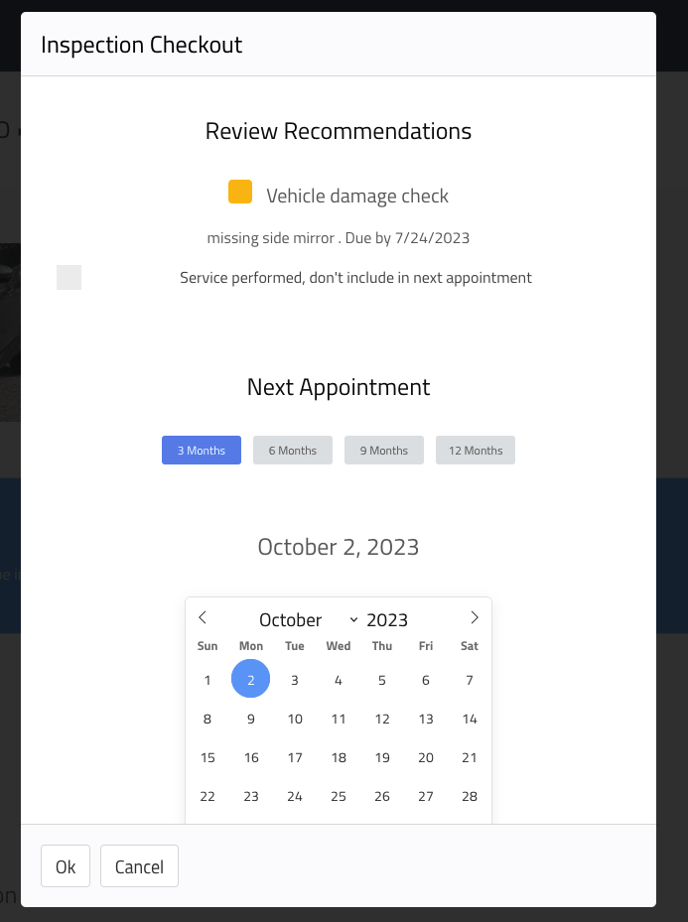
After your customer views the inspection you have shared with them the status will change to [Viewed] and will be ready for check out.


-
Click on an inspection in the [Viewed] status.
-
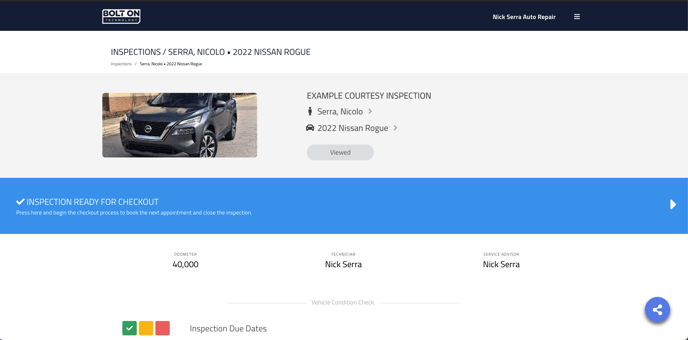
Click on the blue inspection checkout banner.
-
View recommendations made on the vehicle during the inspection.
-
Choose whether or not to include them in the next service appointment.
-
Schedule the customer’s next service appointment.
-
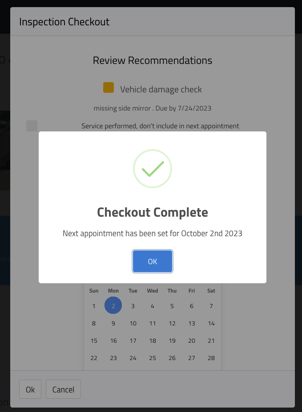
Click [Ok].
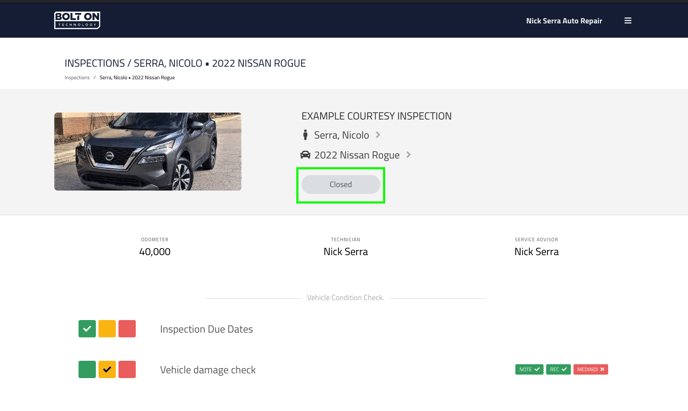
When the checkout process is complete your inspection will change to the [Closed] status.



-
The checkout is now complete and your customer’s next service appointment has been added to your NextGear calendar (if applicable).
Manually changing inspection statuses
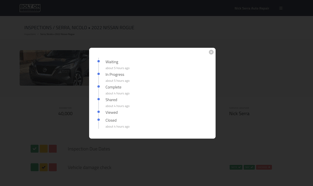
The status of your inspection will progress automatically through the workflow stages. However, you also have the option to manually change the status if needed.
-
Click the status field within your inspection.
-
Click the status you would like the inspection to be in.
-
Your updates will save.


Editing a work order associated to an inspection
-
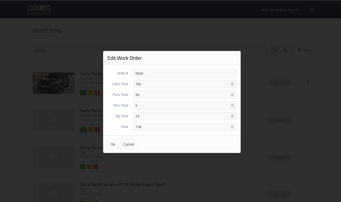
You can edit the following work order information associated with an inspection in NextGear:
-
Order #
-
Labor Total
-
Parts Total
-
Misc Total
-
Tax Total
-
Total
-
-
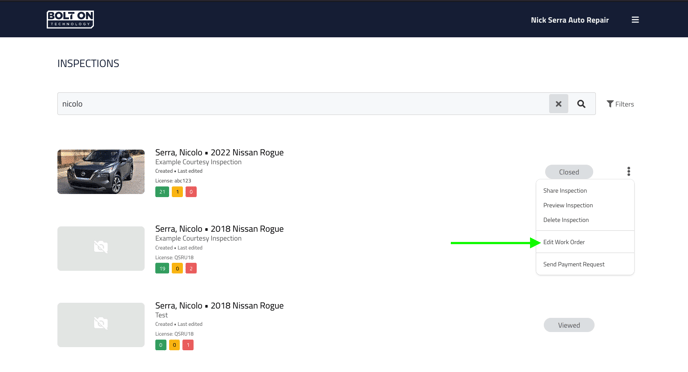
Navigate to your main inspection page.
-
Click the three stacked dots icon to the far right of the inspection you wish to edit.
-
Click [Edit Work Order].
-
Enter your work order information.
-
Click [Ok].
This information will help power the reporting available in your NextGear account.
