
You can now enable Miles within your instance in under 10mins.
The main reasons your should enable Miles are to help your shop efficiency (more time on work, less time scheduling and booking on the phone) and improving the customer experience (customers can call, text, or schedule and always recieve a good response). Even answering 7-8 extra calls a day that would've slipped through the cracks, will drastically increase your average orders.
3 Steps to Set Up Miles Yourself in Minutes!
- Enable Miles within you Management Tab-> Company Settings->Miles Service Drive
- Adjust your Appointment and Calendar Settings (this controls how Miles interacts with your calendar and appointments)
- Toggle Miles on within Services Tab->Messages or the “Messaging Center”
Here is a video of this walkthrough: https://www.loom.com/share/087b5d25fc00449698b8664631170a2b
If you have any questions about setup, benefits, or your plan, reach out here: https://calendly.com/d/dtjm-g3d-2cs/miles-live-training
1) Enable Miles within your Company Settings
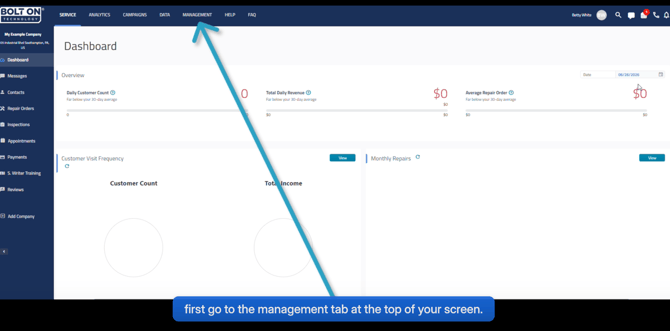
First go to management tab at the top of your screen
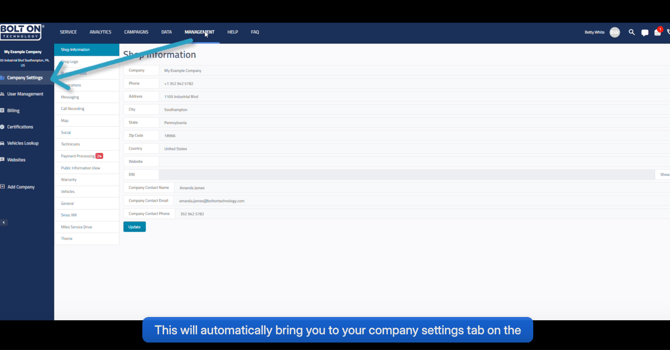
This will automatically bring you to your company settings tab
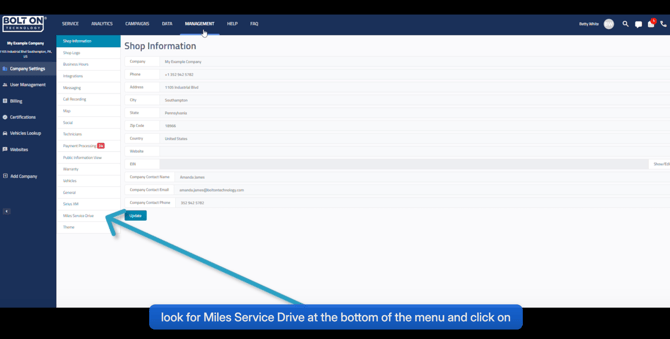
At the bottom of the sub menu you will find Miles Service Drive
Once you click on the Miles Service Drive Tab you will find these options to enable for Miles:
Toggled Off
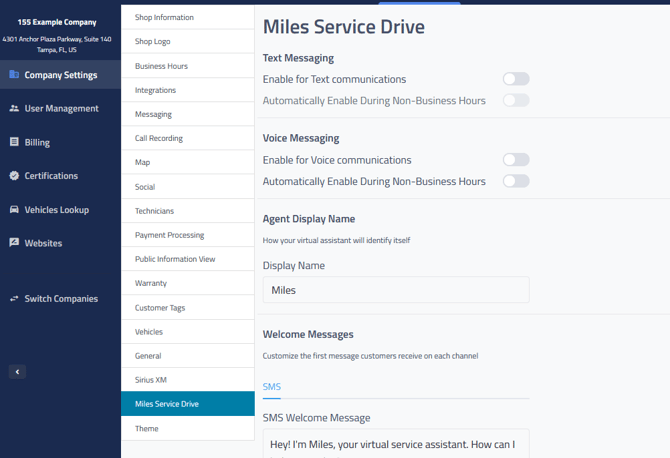
Toggled On
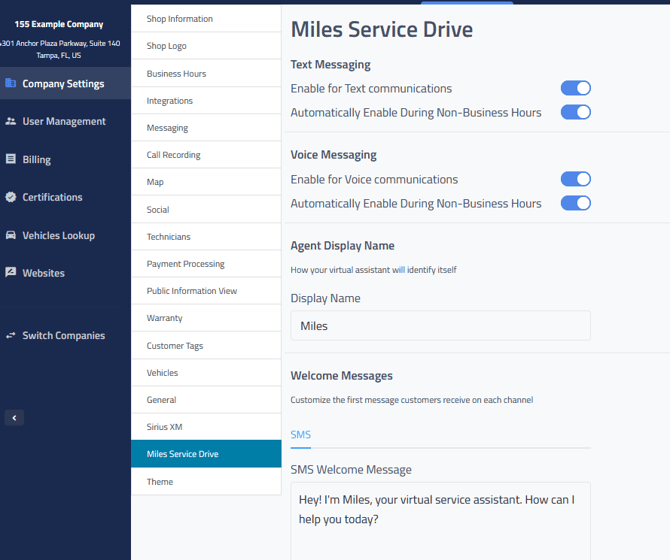
Each one enables a different function of Miles:
Text Messaging- Auto responses to texts within the messaging center
Voice Messaging- Miles answers phone calls and routes or schedules customers, all calls placed within the messaging center
Display Name- Name of "Miles" to your customer
Operating Hours- Hours Miles will operate
Welcome Messaging- Miles welcome message on text
Sign Off- How Miles signs off with customers
*Important and mandatory are the top 4 toggles turned on for Miles to show up in Messaging Center
This enables the features, you still need to update your appointment settings and then enable Miles in the message center.
2) Update your Appointment and Calendar settings
Appointments-> Set Up Button
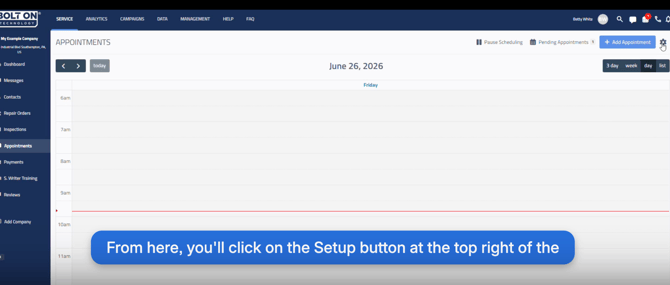
The Setup Button looks like a gear top right!
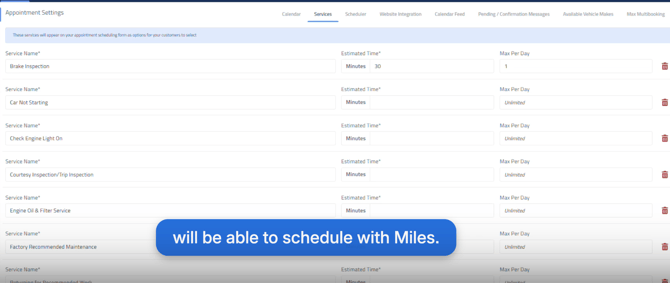
Click on the services tab on the top row menu. From the services tab you can adjust all the different services you offer and can book appointments for.
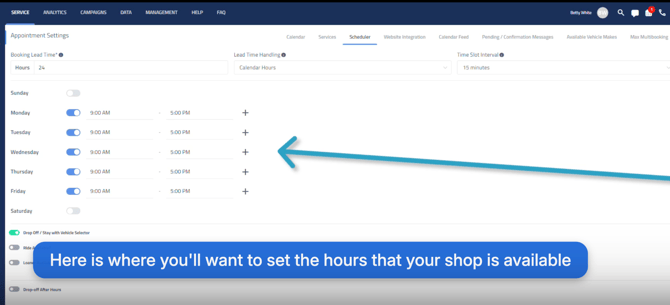
Then go to the Scheduler tab and adjust the settings of your calendar scheduler. This includes the hours people can book appointments
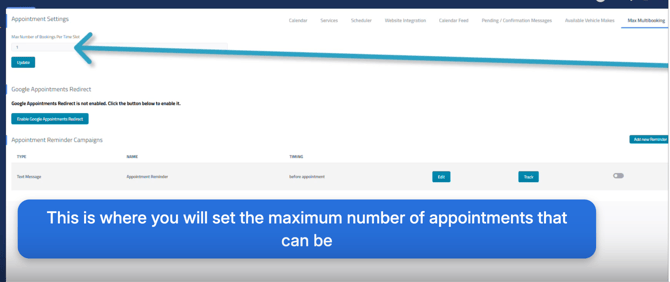
Final step for #2 Go to the tab on the far right “Max Multi-Scheduling” and adjust your maximum number of bookings per time slot! This is your capacity for every 30mins or hour. Say you can handle 3 every hour place 3 here and Miles will continue to book 12:30pm till there are 3 appointments set.
3) Toggle Miles on within the Messaging Center
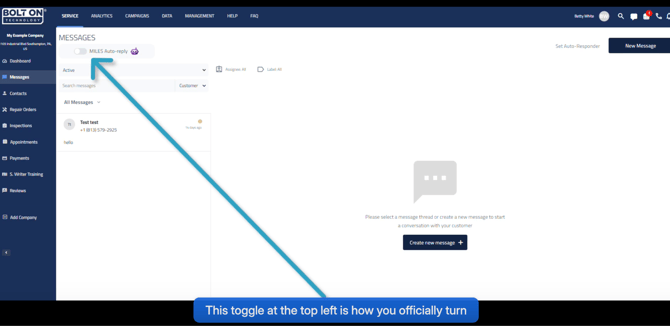
Now navigate over to Service Top Tab then Messages on the left tab. Once in the messaging center you can officially toggle Miles on!
If you do not see Miles like in the photo above it is not properly enabled in the company settings
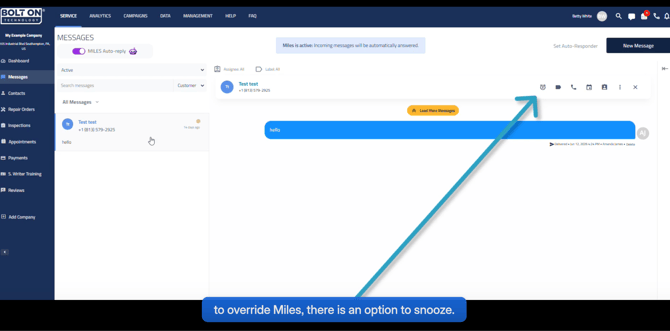
For even more control you can pause or snooze Miles using this setting!
Here is a video of this walkthrough: https://www.loom.com/share/087b5d25fc00449698b8664631170a2b
If you have any questions about setup, benefits, or your plan, reach out here: https://calendly.com/d/dtjm-g3d-2cs/miles-live-training