Adding the Appointment Scheduler to your Website
Retention Pro includes an online appointment scheduler for your website, available in Appointment Settings.
If you have any additional questions about the Appointment Scheduler or need any further assistance please feel free to reach out to our Support team via the ticket portal.
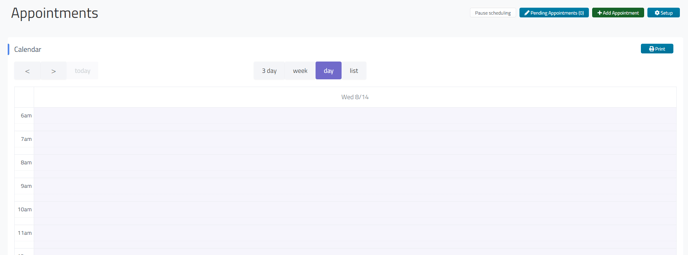
First, go to the Appointments screen within Retention Pro.

From the Appointments screen you will access the Appointment Settings and Online Appointment Scheduler options by clicking on the Setup button at the top right of the screen.
Once you click the Setup button it will open the Appointment Settings page with menu options to select.

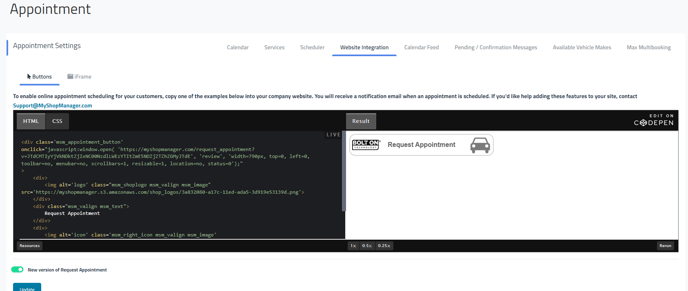
To access the codes for the Appointment Scheduler you would click on Website Integration from the Appointment Settings panel.

When the page first comes up you will see the code and preview for the “Button” option. The button option means that it will embed the button on your website, when a customer clicks on the button it will open a new tab/window for them to fill out the appointment request form.
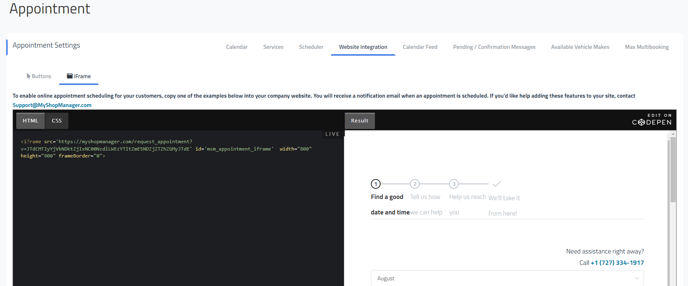
You will also see at the top left where it says “iFrame”.

If you click on iFrame it will load the code and preview of the appointment request form itself. The iFrame option will embed the form itself on your website so it will not open a new tab/window for your customers but can instead be filled out directly on your website.
Once you determine which format you would like to use you can then click either HTML or CSS at the top left of the black area to access the code you need and copy/paste it onto your website!
Appointments made using this feature will be shown in the Pending Appointments section within Retention Pro. From there, you can easily incorporate them into your Schedule and send out Appointment Reminders.
Return to the main article - Appointments Screen or Calendar
