
Please note: Depending on your point-of-sale we may or may not be able to see appointments created within your point of sale.
📽️If you would prefer a video tutorial for the Appointments section please see Appointments In Retention Pro
The Appointments section can be found by going to Service at the top of your screen and then selecting Appointments from the left side menu. If your point of sale supports the ability for us to read your appointments you will see them listed here but you can also use the Appointments feature for manually adding Appointments onto the calendar and your customers can make appointments through our online scheduler.
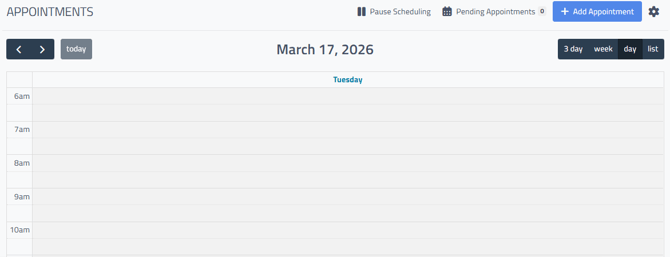

Calendar View
The Appointments screen opens to a calendar view showing all appointments currently visible for your shop. Use the arrows at the top left to move between days or weeks. If you’ve navigated away from the current date, you can click “Today” at any time to jump back to today’s schedule.
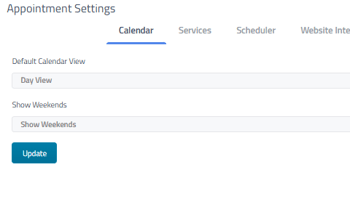
To the right you will see options for "3 day", "week", "day", and "list"; these are for the calendar view itself. 3 day will show three days at a time, week will show a full week, day will only show one day at a time, and list will show a listing of appointments by date instead of it showing as calendar blocks. A default setting for this can be set in your appointment settings under the Calendar menu option.
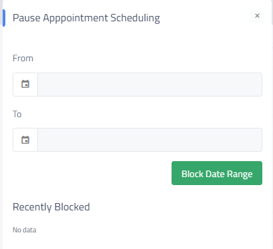
 Pause Scheduling
The Pause Scheduling option lets you block specific days from your calendar when using our appointment scheduler. While days with a campaign hold are already unavailable for appointments, Pause Scheduling is useful when you’re open and still want campaigns to run, but don’t want to accept any bookings. Click the Pause Scheduling button, then use the pop-up to select the dates you want to block.
Pending Appointments
Appointments requested through the online appointment scheduler (once it has been placed on your website) can be found here to Confirm/Adjust as needed before they are added to your schedule. To access your pending appointments you would select the Pending Appointments button at the top right of the Appointments screen.


Add Appointment
You can also add appointments manually into Retention Pro and use this as your appointment calendar.
To add an appointment from the appointment screen, click the blue Add Appointment button.


From the pop-up window you can search, add a customer, add their vehicle information, and pick their appointment date/time/duration. Then select if they will wait with their vehicle, use a loaner, assign a service writer and technician, or add notes for the appointment. You can also choose to send them a confirmation by text or email.
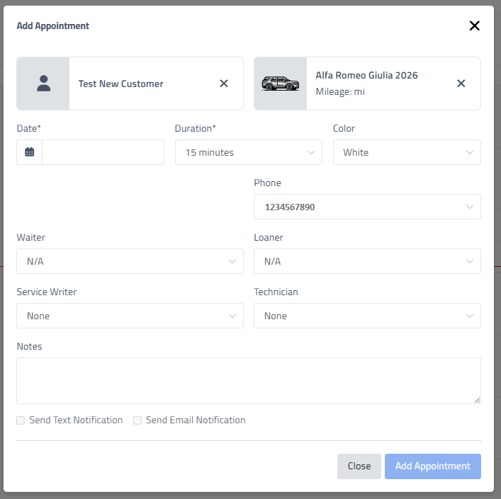
Once all of the information on the form has been filled out click the Add Appointment button at the bottom to create the appointment and send the selected notification.
Cancel An Appointment
To cancel an appointment that is already added to your schedule in Retention Pro, simply click on the corresponding appointment block in your calendar.
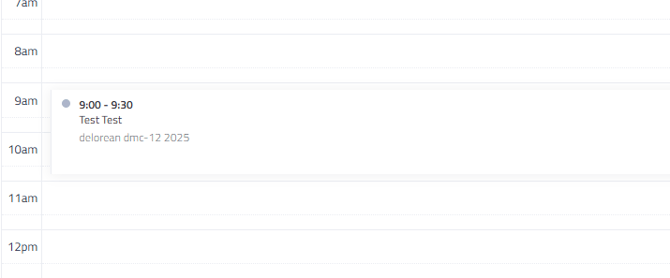
This will display a pop-up window containing all relevant details for the appointment, along with options to either Cancel the appointment, Close the window, or Save any changes made.
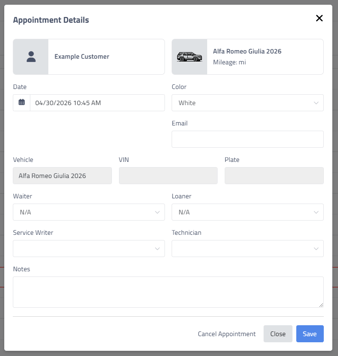 Clicking the Cancel Appointment button will prompt a confirmation alert to ensure you wish to proceed with canceling the appointment. Click on OK to finish canceling the appointment.
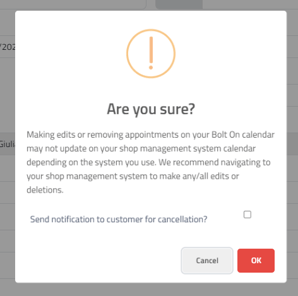
You can uncheck the box next to "Send notification to customer for cancellation" if you do not wish for the customer to receive a notification that their appointment has been cancelled.
Setup/Gear Icon
Access to additional Appointment settings and the Online Appointment Scheduler options can be found by selecting the Gear icon at the top right of the Appointments screen. For more information on Appointment Settings please see Appointment Settings in Retention Pro